When it comes to roofing solutions, metal emerges as a top contender due to its unmatched durability, aesthetic versatility, and eco-friendly attributes. Whether you’re planning a renovation or starting from scratch, installing metal roofing can significantly enhance your home’s longevity and curb appeal. This detailed guide not only demystifies the process of metal roofing installation but also equips you with practical insights to successfully execute this project independently.
Planning and Preparation: Essential Steps Before Metal Roofing Installation Begins
To achieve a flawless installation of metal roofing, meticulous planning and thorough preparation are essential. Here’s how to set the stage for success:
- Compile Tools and Materials
- Gather all necessary tools and materials needed for the installation, including roofing panels, fasteners, and safety equipment.
- Prioritize Safety Measures
- Equip yourself with appropriate safety gear to ensure protection throughout the project.
- Conduct Roof Inspection
- Assess the current condition of your roof to identify any repairs or adjustments needed prior to installation.
- Accurate Measurements
- Take precise measurements of your roof to determine the correct quantity of materials required.
- Consider Weather Conditions
- Plan the installation during suitable weather conditions to avoid delays and ensure optimal working conditions.
- Arrange Support if Necessary
- If the project requires additional manpower or expertise, consider enlisting help to facilitate a smooth installation process.
By addressing these preparatory steps diligently, you pave the way for a successful metal roofing installation, enhancing both the efficiency and longevity of your roof.
Choosing the Right Metal Roofing: Factors to Consider
When selecting metal roofing for your home, several factors should guide your decision-making process to ensure optimal performance and aesthetic appeal.
- Types of Metal Roofing
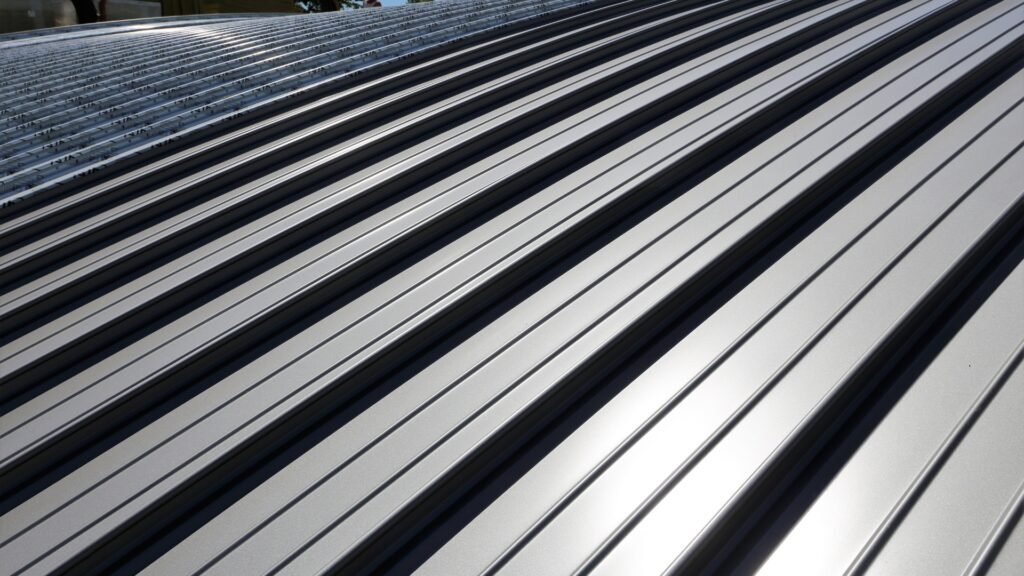
- Understand the different types of metal roofing available, such as corrugated, standing seam, and metal shingles.
- Evaluate each type based on durability, style, and suitability for your climate.
- Durability and Longevity
- Consider the lifespan of the metal roofing materials.
- Opt for high-quality materials that offer excellent resistance to weather elements and corrosion.
- Aesthetic Appeal
- Choose a metal roofing style that complements your home’s architectural design and enhances curb appeal.
- Explore various color options and finishes to achieve the desired look.
- Energy Efficiency
- Assess the energy-saving properties of different metal roofing options, such as reflective coatings that can reduce cooling costs.
- Cost and Budget
- Determine your budget and compare the cost-effectiveness of various metal roofing materials.
- Factor in long-term savings and maintenance costs when making your decision.
- Installation Requirements
- Understand the installation requirements and complexity associated with each type of metal roofing.
- Consider whether you will install the roofing yourself or hire a professional.
By carefully evaluating these factors, you can confidently choose the right metal roofing that aligns with your home’s needs and enhances its overall value and durability.
Preparing the Roof Surface for Metal Roofing Installation
Before installing metal roofing, proper preparation of the roof surface is crucial to ensure durability and a seamless installation process. Here’s how to effectively prepare your roof:
- Clear Debris and Clean the Surface
- Begin by removing any debris, leaves, and loose materials from the roof.
- Use a broom or leaf blower to clear the surface thoroughly.
- Inspect and Repair
- Carefully inspect the roof for any signs of damage, such as cracks or leaks.
- Repair damaged areas using appropriate roofing materials to ensure a solid base.
- Apply Underlayment
- Install a suitable underlayment to provide an additional layer of protection against moisture.
- Choose underlayment materials that are compatible with metal roofing and your local climate.
- Install Flashing
- Properly install flashing around roof penetrations, such as chimneys and vents.
- Use durable flashing materials to prevent water intrusion and ensure long-term integrity.
- Check Roof Pitch and Alignment
- Verify the roof pitch and ensure it meets the requirements for installing metal roofing.
- Use a level to check for proper alignment and adjust as necessary before proceeding.
- Consider Weather Conditions
- Plan to prepare the roof surface during dry weather conditions to facilitate effective installation.
- Avoid working on wet or icy surfaces to prevent safety hazards and ensure adhesive effectiveness.
By following these steps to prepare your roof surface, you create a stable foundation for installing metal roofing that enhances both the longevity and performance of your home’s roofing system.
Installing Metal Roof Panels: Step-by-Step Guide
Installing metal roof panels requires precision and attention to detail to ensure a secure and weather-resistant roofing system. Follow these steps for a successful installation:
- Prepare for Installation
- Gather all necessary tools and materials, including metal panels, fasteners, and safety equipment.
- Ensure the roof surface is clean, dry, and prepared according to manufacturer guidelines.
- Start at the Eaves
- Begin installing metal panels at the lowest point of the roof, typically at the eaves.
- Align the first panel flush with the edge of the roof and secure it in place using appropriate fasteners.
- Overlap Panels Correctly
- Install subsequent panels with a slight overlap to ensure proper water drainage.
- Follow manufacturer instructions regarding overlap dimensions and fastening techniques.
- Fastening Methods
- Use screws or nails recommended by the manufacturer to secure metal panels to the roof deck.
- Place fasteners in the designated areas on each panel to prevent wind uplift and ensure stability.
- Maintain Alignment
- Maintain consistent alignment and spacing between panels to achieve a uniform appearance.
- Use a chalk line or straightedge to guide panel placement and ensure straight rows.
- Cutting and Custom Fitting
- Measure and cut metal panels as needed to fit around roof penetrations, such as chimneys or vents.
- Use tin snips, shears, or a nibbler for precise cuts and smooth edges.
- Install Ridge and Hip Panels
- Install ridge caps along the ridges of the roof and hip caps along the hips for a finished look.
- Secure ridge and hip panels with appropriate fasteners and ensure they overlap correctly with adjacent panels.
- Final Inspections
- Inspect the installed metal panels for any gaps, loose fasteners, or alignment issues.
- Make necessary adjustments and ensure all panels are securely fastened and aligned.
By following these steps meticulously, you can achieve a professional-quality installation of metal roof panels that enhances the durability, aesthetics, and weather resistance of your home’s roofing system.
Cutting and Shaping Metal Roofing: Techniques for Precision and Efficiency
Cutting and shaping metal roofing requires careful attention to detail to ensure a seamless fit and professional finish. Follow these steps and tips for optimal results:
- Gather Essential Tools
- Before starting, gather the necessary tools including tin snips, aviation snips, electric shears, or a nibbler depending on the thickness of the metal.
- Ensure safety equipment such as gloves and safety glasses are worn throughout the process.
- Measure and Mark
- Measure the area of the roof where the metal needs to be cut or shaped.
- Use a straightedge and marker to mark the cutting lines on the metal roofing panels.
- Cutting Techniques
- Use tin snips for straight cuts or curves in thinner metal roofing panels.
- Electric shears or a nibbler are ideal for thicker metal panels or more complex cuts.
- Cut slowly and steadily to maintain control and achieve clean edges.
- Handling Curves and Angles
- For curved cuts, gradually nibble away excess material while following the marked curve.
- Use aviation snips for precise cuts around angles or corners, ensuring the metal remains intact and undamaged.
- Trimming for Obstacles
- When encountering obstacles such as chimneys or vents, measure and mark the metal roofing panel accordingly.
- Cut out sections as needed to fit around obstacles, ensuring a snug and secure fit.
- Testing Fit
- After cutting, test-fit the metal roofing panel to ensure it aligns correctly and covers the intended area.
- Make any necessary adjustments to the cut edges or shape before final installation.
- Safety and Clean-Up
- Dispose of metal scraps and sharp edges properly to prevent accidents.
- Clean the work area regularly to maintain a safe and organized workspace.
By following these techniques and tips for cutting and shaping metal roofing, you can achieve precise and efficient results that contribute to the overall quality and durability of your roof installation.
Installing Flashing and Trim for Metal Roofing: Essential Steps for Longevity and Aesthetic Appeal
Proper installation of flashing and trim is crucial to ensure your metal roofing system remains watertight and visually appealing. Follow these steps for a seamless installation:
- Types of Flashing
- Understand the different types of flashing such as ridge, valley, and drip edge.
- Choose flashing materials that match the durability and longevity of your metal roofing.
- Prepare the Roof Surface
- Clean and prepare the areas where flashing will be installed.
- Ensure the surface is dry and free from debris to promote adhesion and prevent moisture penetration.
- Install Underlayment
- Apply underlayment where flashing will be installed to provide an additional barrier against water infiltration.
- Cut and Shape Flashing
- Measure and cut flashing materials to the appropriate lengths and shapes using tin snips or shears.
- Ensure precise cuts to fit around corners, vents, and other roof penetrations.
- Secure Flashing
- Position flashing along valleys, ridges, and roof edges as per manufacturer guidelines.
- Secure flashing using appropriate fasteners or adhesive to ensure a tight seal and prevent uplift.
- Apply Sealant
- Apply roofing sealant or caulking around the edges of flashing to enhance waterproofing and weather resistance.
- Use a caulking gun for precise application and smooth out excess sealant for a neat finish.
- Install Trim
- Install trim pieces along the edges and corners of the roof for a finished appearance.
- Secure trim with nails or screws at designated intervals, ensuring it aligns properly with the metal roofing panels.
- Inspect and Seal
- Inspect installed flashing and trim for any gaps or loose areas.
- Seal any gaps with additional sealant to prevent water intrusion and ensure a durable installation.
By following these steps for installing flashing and trim, you can enhance the longevity and aesthetic appeal of your metal roofing system while ensuring superior weather protection and durability.
Finishing Touches and Inspection: Ensuring a Perfect Metal Roofing Installation
Completing the installation of your metal roofing involves thorough inspection and final touches to guarantee longevity and visual appeal. Here’s how to wrap up your project effectively:
- Final Panel Checks
- Inspect each metal roofing panel to ensure they are securely fastened and properly aligned.
- Tighten any loose screws or nails and make adjustments as necessary to maintain uniformity.
- Sealant Application
- Apply a final layer of sealant around all exposed fasteners and seams to enhance waterproofing.
- Use a caulking gun for precise application and ensure all gaps are adequately filled.
- Trim Adjustment
- Check and adjust trim pieces for proper alignment and secure attachment.
- Ensure trim edges are smooth and flush with the metal roofing panels for a polished finish.
- Clean-Up
- Remove any debris or construction materials from the roof and surrounding areas.
- Keep gutters and downspouts clear to prevent water accumulation and potential damage.
- Weatherproofing Inspection
- Verify that all flashing, seams, and joints are properly sealed and weatherproofed.
- Conduct a thorough inspection to identify and address any potential areas of concern.
- Final Safety Check
- Ensure all safety measures, such as ladder stability and personal protective equipment, are in place and adhered to throughout the project.
- Documentation and Warranty
- Keep records of the installation process, including receipts, warranties, and maintenance schedules.
- Familiarize yourself with the manufacturer’s warranty and recommended maintenance guidelines.
By completing these final touches and conducting a comprehensive inspection, you can ensure your metal roofing installation is not only aesthetically pleasing but also durable and weather-resistant. Taking the time to perform these steps diligently will contribute to the long-term performance and value of your home’s roofing system.
Maintenance and Longevity of Metal Roofing: Essential Tips for Durability
Maintaining your metal roofing is key to maximizing its lifespan and preserving its appearance. Here’s how to ensure your roof remains in top condition:
- Regular Inspections
- Conduct visual inspections of your metal roof at least twice a year, preferably in spring and fall.
- Look for signs of damage, such as loose panels, rust spots, or debris accumulation.
- Cleaning
- Remove debris, leaves, and branches from the roof surface to prevent moisture buildup and potential damage.
- Use a soft-bristled broom or leaf blower to gently clean the roof without causing scratches.
- Check and Clear Gutters
- Keep gutters and downspouts clear of debris to ensure proper drainage and prevent water backup.
- Inspect gutter joints and seams for leaks and repair as needed.
- Inspect Sealants and Flashing
- Check the condition of sealants around vents, chimneys, and skylights.
- Replace any deteriorating sealant to maintain waterproofing and prevent leaks.
- Address Rust and Corrosion
- Treat any signs of rust or corrosion promptly to prevent further damage.
- Use appropriate rust inhibitors or coatings recommended by the manufacturer.
- Trim Overhanging Branches
- Trim tree branches that hang over your roof to prevent scratches and debris accumulation.
- This also reduces the risk of branches falling and causing damage during storms.
- Professional Inspections
- Schedule professional inspections every few years, especially after severe weather events.
- A professional roofer can identify potential issues early and recommend necessary repairs.
- Follow Manufacturer’s Guidelines
- Adhere to the maintenance recommendations provided by the manufacturer of your metal roofing.
- This includes guidelines for cleaning, maintenance products, and warranty coverage.
By following these maintenance tips diligently, you can extend the lifespan of your metal roofing and ensure it continues to protect your home effectively against the elements. Regular inspections and proactive maintenance are key to avoiding costly repairs and preserving the beauty and functionality of your roof for years to come.
Conclusion: Enhance Your Home with Metal Roofing Installation
Opting for metal roofing not only enhances your home’s durability and aesthetic appeal but also provides long-term savings and environmental benefits. By following the comprehensive steps outlined in this guide, you can confidently navigate the installation process and ensure your roof stands strong for years to come. Embrace the durability and style of metal roofing to safeguard your home and elevate its curb appeal.